Wednesday, December 30, 2009

Christmas crafting!

Well, Christmas has passed, all the presents have been opened, (I am in loooove with my new iron, btw...) and now I can write about what I made without spoiling any surprises.


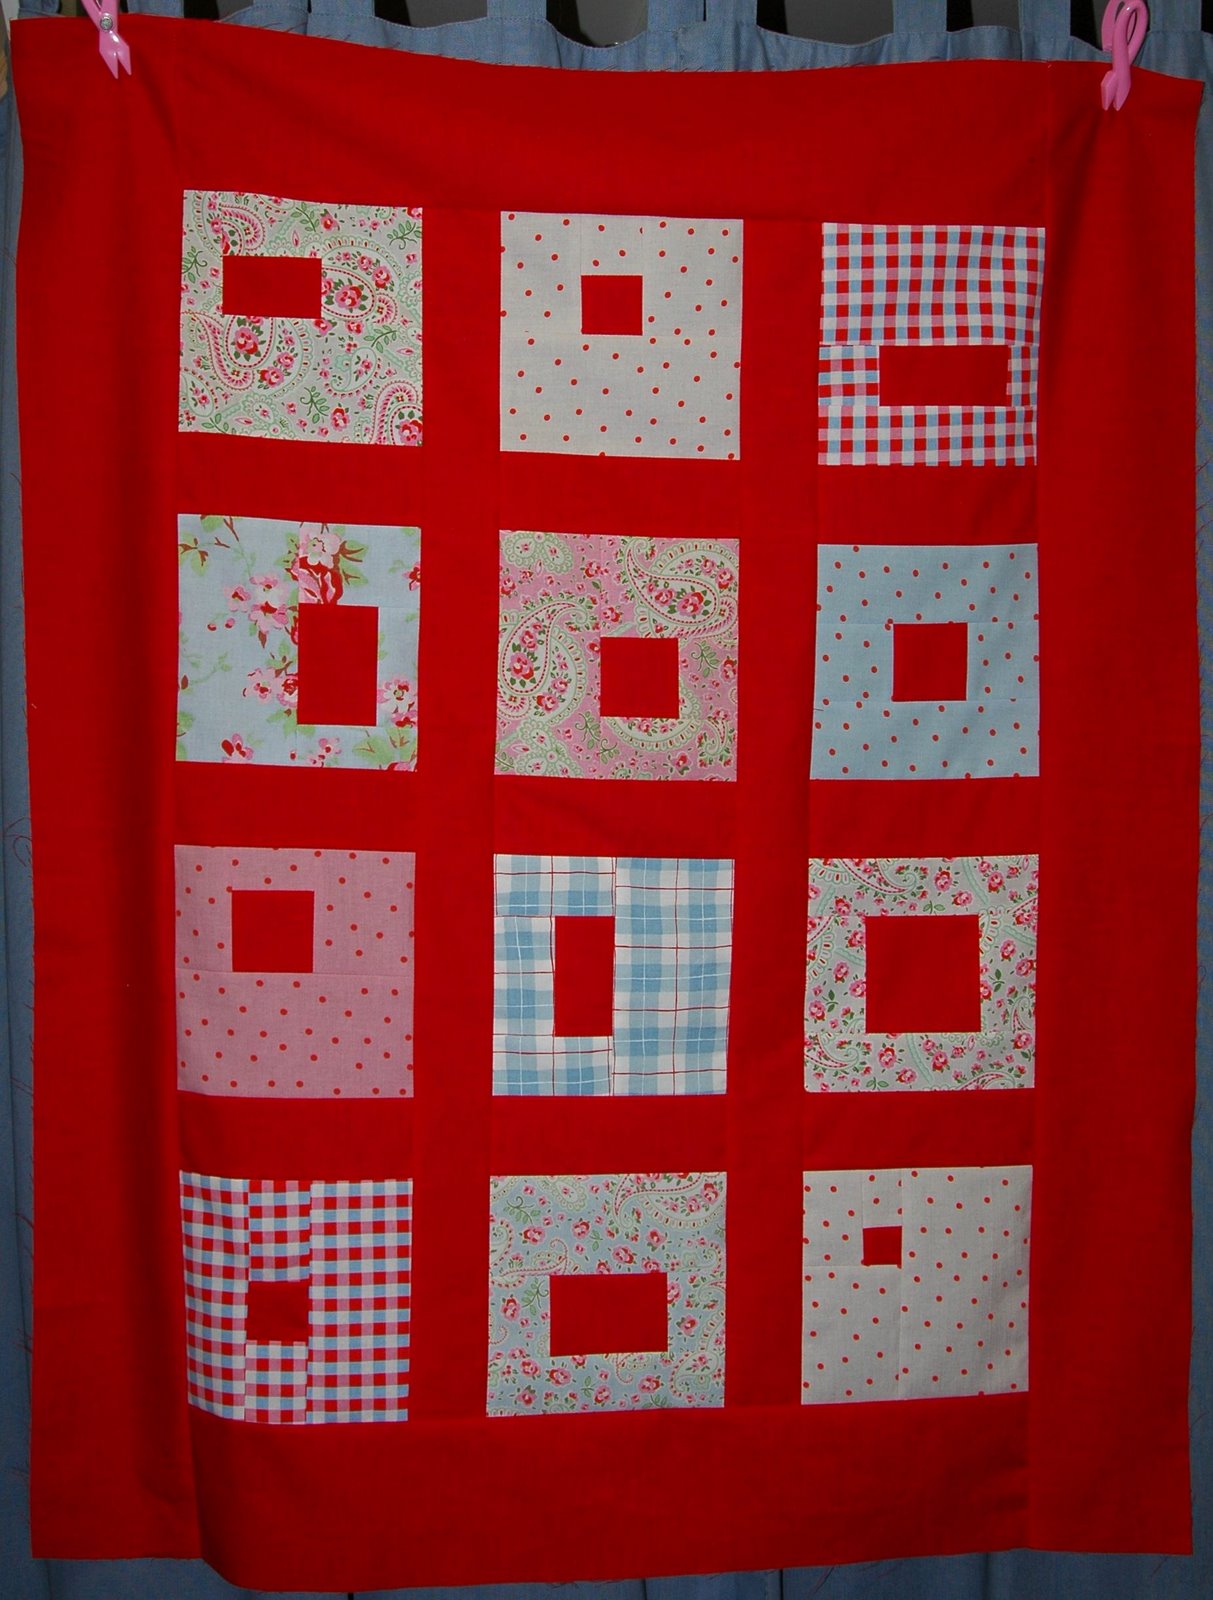
I made a library bag for my niece, who is only a year and a half and already loves library books, respects their specialness, and doesn't mix them with her regular books. I used some novelty fabrics that I had already cut into squares for a project that I started 10 years ago... I don't even remember what it was going to be.

I haven't made a quilted bag before so I sort of made it up as I went along. I knew that I wanted to hide the seams as easily as possible so I actually quilted the top layer to the middle layer, and then lined the bag with what would have been the bottom layer of the quilt sandwich. The flap I made separately and quilted normally. Binding that was quite a pain... I know now to avoid rounding the corners of my quilts.

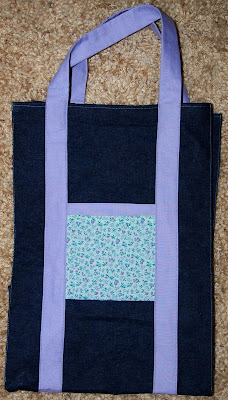
I also made a shoulder bag for my sister, with embroidery on the flap and lining made from an old jacket of hers that had gotten too small. It also has a little embroidery on the strap, specially designed for me by a dear friend, with my sister's initials hidden in the swirls.


Tutorial used:
mmmcrafts' the basic messenger bag


Review: All the steps are pretty easy and it goes together in about 4 hours (I think I sew slowly, though). The tutorial contains all the information that you need and it is easy to follow. I like the shape of the bag a lot. It turns out ok when made with canvas/denim weight material, but I think that it looks the best if you use very heavy material or add interfacing. I made two with pockets and one without pockets. In the future, if I put on pockets, I will probably modify the design to add a zip to each pocket and make them more useful.
At some point I would like to make a little ad-on to the tutorial for making differently sized bags and to streamline the instructions for people who have made it before. (The tutorial has some great explanatory pictures, but it's not easy to glance at the instructions and identify the next step.)
All in all it is a great tutorial and I will definitely be making the bag again. I already have another request in my queue.

Tuesday, December 22, 2009

Sewing clothing

Sewing clothing is not something I am skilled at, but I so want to be! I try patterns and usually end up getting frustrated (like when the sleeve is too big for the arm hole, or when it doesn't fit in the bust and I can't figure out how to fix it...) It's something that I should work on and get good at, but it's just so much easier to sew a bunch of squares together and make a quilt.

Someday I want to be as good as this girl.

Monday, October 5, 2009

Confession

I collect fabric. I pretend that I'm going to make something out of it, but... well... the facts speak for themselves. This is most of the fabrics I have purchased in the last six months:


See this little stack on the far left? That's the pile of fabrics of which I have used even the tiniest scrap. See these other three piles on the right? These are just for looking at. And touching.

I really enjoy prewashing fabric. I put it in the washer, and when it is done I lovingly clip off all of the stray threads, then I dry it, then I take it out and use ironing and folding as an excuse to pet it. Prewashing is when the fabrics and I get to know each other.

I even have fabrics that I haven't prewashed yet because I'm saving the experience. I keep my Eva in the original bag and just take them out to look at. Really, though, can you blame me? It's ridiculously pretty.


Saturday, October 3, 2009

Blogtoberfest day 3!

I sew at a medium sized folding table in the middle of the room. the other day He-Man came in to kiss me and my sewing machine went crazy... suddenly blasting away at full speed. Turns out my presser foot had migrated forward over time so that it was sticking out from under the table and he stepped on it unawares. Thankfully, in the time it took for me to panic, figure out what was happening, and then communicate that he should move his foot, nothing got too messed up.

Friday, October 2, 2009

Blogtoberfest Day 2

Blogtoberfest is so fun! I am enjoying reading about everyone's projects and getting new comments on my blog. :)

A few weeks ago I went to my parents' house and picked up my Mom's sewing things. (Tons of cool stuff... but that's for another post). One of the things I got was a bunch of satin and velvet leftovers from when Mom made all the bridesmaids dresses for my sister's wedding. Isn't that amazing? I don't know if I would want to commit to such a task. o.o

I figured I didn't have much use for them, and it might be nice for my sister to see them around and be reminded of her wedding, and Mom, and whatnot. I came up with the idea of making a little play skirt for her daughter Redhead. I used a weirdly shaped leftover piece of maroon velvet that was a bit less than a yard... should have taken a picture. I cut out the biggest rectangle patch that I could, then used the rest of it to make little gores around the bottom edge. I don't know exactly how you are supposed to sew in gores, so I just kind of made something up, and some of mine turned out pretty funky. Redhead is only 4, though, so what will she care?


I wanted to make the elastic right for her waist, but she wasn't around... so I used my leg. Yeah, just one. And not that high up, either. I spent the whole time I was sewing feeling jealous of a four-year-old's figure.

Thursday, October 1, 2009

Blogtoberfest Giveaway!

So here’s the deal. I like to make things complicated. For myself… for you… for everybody. And that’s what I’m going to do. My plan is this. For starters, I’m giving away a 1 yard length of My Folklore by Lecien.


(I bought the fabric because I loved the color combo in Lynn's Common Threads Bee quilt... but when all of the pieces arrived, I found that they were different dye lots or something and didn't match well enough for my taste.)

If I get more than 50 entrants for the giveaway, I will add a second prize because I think it’s nice if you have a real chance to win. Then every extra 50 after that I will add another prize, up to a total of 5 prizes. Fun, yes? These extra prizes are still a mystery to you because they are still a mystery to me. Winner(s) will be chosen by random number generator, and first name picked gets first pick of prizes and so on.

BUT WAIT. I am not done being complicated. To enter, leave a comment telling me what your next project is going to be. You can enter a second time by posting a (relevant) comment on ANY other post in the history of this blog, limit 1 extra entry. Please make sure I am able to contact you! The giveaway will end on October 31st at midnight, and I will be posting prizes overseas (unless I come up with one that is super heavy, in which case I will note that when I post the prize). Good luck everyone!

Yes, this giveaway is a disguise for shameless self-promotion.

EDIT: We have 50 entries, so I'm adding a second prize. Prize number 2 is a corduroy pumpkin pincushion and a half yard of fall themed fabric:

Wednesday, September 23, 2009

Still working...

On the quilt for Redhead. (I've decided that "my oldest niece" and "my second to youngest niece" is too unwieldy. So Redhead is the new name for my oldest niece. Although... actually it looks like all of my nieces may be redheaded...)

I got this little embroidery in from my oldest sister, who is the Best Girl, and sewed it up into a square:


Check out the "fuzzy stitch" that she made up:


And I just loooove her little signature on it:


Hopefully I'll have more embroideries to share soon. (*hint hint* sisters get to work!)

Sunday, September 20, 2009

New activity

I decided that since I spend about half of my waking hours at the office, I was going to look for ways to dress up my desk. First step was this little tissue box cover:


I looked up some tutorials online, but they looked easy so I just came home and winged it. The opening came out a little funny, and it ended up a little short because the seams at the top have more bulk than they should. It still looks cute, though, and will help dress up my desk. :)

Also, I have been working a bit on my blog... I was frustrated by Blogger because it doesn't let you reply to comments, so I am trying out a new Intense Debate comment system. We'll see how it works. :)

Friday, September 18, 2009

Swaps

I think swapbot and I need to see other people. I always look at new swaps and think they look like fun, but it turns out to be a bit of a pain to get things out on time. Even worse, looking back over the swaps that I've done, I see that there wasn't a single one where I received something that I liked as much as what I sent out. So really, the only thing that I liked about it was getting ideas for things to make.


Like this messenger bag. I made it for a swap that called for a monochromatic package. My partner requested orange. I had some orange corduroy pieces that I bought from someone on Craigslist, and I paired it with some brown and yellow from my stash:


(That's the bag inside out)

This bag is on my sewing list now because I love how it turned out and I need one for myself. Thing is, I never would have thought of making it without the challenge of making something orange that someone else might like. I tried applique for the first time on this project, as well.


(As you can see...)

So if I break up with swapbot, where am I going to find challenges like this?

Tuesday, September 15, 2009

Second rosali baby quilt

I don't like to think things, I like to know things. So when I first saw quilts with pieced backs, which my mother never did, I thought "Well, why doesn't anyone make both sides the front. I will be the FIRST EVER to do this."

Actually... I get into trouble a lot with this sort of thinking. Like when I decide it'll be easier to sew a seam before turning the purse inside out instead of after like the instructions say... and then discover that with the seam sewn it is impossible to turn the purse inside out.

In case there are other curious souls out there who couldn't figure it out without trying to do it...
a) lots of work
b) more piecing on front and back makes it harder to quilt evenly
c) impossible to get both "fronts" lined up perfectly, so one of them will be a bit crooked.
d) only one side can point up, so why waste all that effort?

If you decide you want to do this, I recommend extra size borders on each side so that when you trim the crookedness won't be as noticeable.

So here is what I made, in red for my second-to-youngest niece, who has a fresh and bold personality even at the tender young age of 13 months.

The front of the quilt is similar to the green version. Here it is before quilting:


The other front is a nine-patch using the same red:


And for my second foray into quilting, I closely quilted the blocks on the front in a spiral pattern, leaving the sashing unquilted. I like how it emphasizes the blocks, but it was a pain compared to the diamond quilting on the green version.


fyi, my sister is using it nine-patch side down.

Thursday, August 13, 2009

Finally!

Both presents have arrived, so I'm free to brag now. I used the Rosali fabric that I won to make two pretty little baby quilts. They are on the small side, even for baby quilts, only 30" by 36", but at least one of my sisters claims that it is perfect size. I chose the size because I was thinking of it as a little quilt to sit on when playing on the floor.

I designed the front of the quilt by drawing the blocks out on graph paper. I haven't seen a quilt quite like this before, and now I know the reason. When every block is different, you have can't take any shortcuts with cutting. It was painfully slow and after I finished the first one I almost didn't do the same thing for the second.

For my youngest niece, I used green sashing and a lighter green polka dot backing:


The back of hers has 6 wonky paintbox blocks set off center. I loved how they turned out, and I'm definitely going to try this again. I used oh fransson's tutorial. It is for regular paintbox blocks, but it was easy to make them wonky at the trimming step.


The binding is leftover fabric from the blocks. I was astonished at how much fabric I still have left over!


My sister sent me a picture of my niece cuddled up in the quilt and I felt sooo proud and happy.

Tuesday, July 21, 2009

Danger, Will Robinson

Rotary cutter versus fingernail... rotary cutter wins.


A relatively cheap lesson when you consider how close it came to my tender finger flesh. o.o

Monday, July 13, 2009

Some more swaps...

Just in case anyone is wondering, these aren't poorly shot pictures. They are brilliant masterpieces with an aura of mystery. Just so you know.

I finished up a needle book, which does not look *anything* like an underwear liner when it is open:

After I had sewn the needlebook completely, I decided that it needed something to decorate the exterior, so I embroidered two cherries on the flap. I did it without disassembling the book by embroidering blind through a single layer. Lesson learned: embroidery first, sew second!

I also embroidered these two bookmarks. I think undyed fabric was a really great choice for these:


And meanwhile I have been working on my not-exactly-secret project...

Monday, July 6, 2009

An overdue thank you and vegetables (not overdue)

First an embarrassingly overdue thank you to Evelyn at Use The Loot for the Rosali fat quarters that she sent me. Yes, they did arrive, and I love them! I worked all last weekend on two little baby quilts for my youngest nieces. I am trying to decide whether to post pictures or leave it as a surprise. I'm not sure I can wait to share, since I still have a good bit of work to do.

So I'm on a new kick to get my veggies every day. I am targetting lunch time, because that's an easy place for me to make menu changes without affecting anyone else. I guess it's just laziness that was keeping them out of my lunches, since I genuinely like a lot of vegetables. Carrots are crunchy and delicious. Sugar snap peas are the most decadent treat. Broccoli is way cute and totally tasty. And don't even get me started about corn-on-the-cob.

I started with some carrots; I bought a big bag and put them in the fridge at work. I just wash them and then munch on them whole, because really, why do they need to be cut up? This eased me into thinking that it would be simple to add more vegetables, so I made up a list of ones that I could eat raw, and then looked up vegetables that I could cook in the microwave here at work.

Of course my first microwave experiment was corn on the cob (husked, 2.5 min), which needed maybe another minute in the nuculator, but tasted just like corn. Today I had some butternut squash (cut in half, face down on plate, 1/2" water on plate, 7 min). I'm not sure if it was the microwave preparation or the squash itself (I'm used to winter squash, not butternut) but the flavor seemed a bit lacking. Probably the squash, right? How could the microwave suck out flavor? Regardless, it was a good meal and I will probably try again with other squash options.

So everyone eat your veggies! It's easy and they are so good for you.

Sunday, June 14, 2009

Swaps

I finished up two swaps this weekend! Most people wait until their swaps have arrived before blogging about them, but since none of my three readers know my swap partners, I think I'm safe.

The first is for a set of nine patches:


The yellow and blue patches are 12.5" raw to raw and the shades of blue patches are 10.5" raw to raw. WAT?? Yeah seriously, the girl requested 10.5" squares. She said that she didn't really understand seam allowances, but that all of her other squares were that size. That works out to squares cut 3 5/6", so I ended up cutting them 4" and then just sewing them together repeatedly with different seam allowances until it turned out right. (Mostly) It was quite a pain.

I also made a reusable grocery/tote bag. I started this swap a little early, and made this bag from some remnant fabric that I found at Joann's. Two dollars for it! I think it's meant for upholstering outdoor furniture.


It ended up being more of a beach tote shape than a traditional grocery bag shape because the fabric remnant was only 18" x 60", so my options were limited. Because of the cut shape, I made the bag with a seam on bottom and up one side instead of a seamless bottom and seams on both sides. As usual, my "wing it" attitude made the bag more difficult than it had to be (attaching the straps was un-fun), but I got through it.
Unfortunately, by the time I had finished the bag, I was sort of in love. I mean... look at how the pocket stripes head the other direction! It's just a grocery bag, but I couldn't give it away. Luckily, once my partner was assigned, I saw that her preference is for lavender and teal, so I had an excuse to make her a new bag and keep that one. I made it out of some denim fabric that I had stashed and accented it with some leftover costume fabric. This was the result:


Hopefully my partner likes the denim bag... it's not much to my taste so I don't mind sending it off. :P

Monday, June 1, 2009

4th finish and whoa progress!

I sewed up this little number a few weekends ago and just now got around to taking pictures:


I started by randomly cutting into a pair of old jeans, which probably wasn't the most efficient thing, since I later wished that I had left on some of those fabric bits that I had cut off initially, but it was great for the creative process because I ended up having to piece bits back together to get the size of bag that I wanted. It's just right for carrying around my embroidery... except that now I only have one little one left to finish. You can sort of see the little Winnie-the-Pooh fabric that I used to line the bag... that was a steal from Walmart. It's not a very durable-looking fabric, but it's nice and soft. :)

This weekend I worked on my big quilt, and oh-em-gee it's going faster than I expected. I finished all of the pieced blocks for the center of the top and got a good start on the pieced border. Here's what it looks like so far:


I am so, so pleased!

Thursday, May 28, 2009

2 finishes!

I surprised myself by finishing these two embroidery patches during my camping trip, which was really fun (and ended too quickly.)


The little mexican kitty is one of my favorites. She started with a pink bow, but I think the red is more fitting.

Tuesday, May 19, 2009

Fabric arrived and quilt squares made

I tested my fabric for colorfastness and laid it out this weekend:


I'm pleased... it really looks good! And my first squares came out well, also:


A major bummer, though... on one of the embroidery squares (not shown) I cut in the wrong place and had to piece on an additional piece of fabric. I guess it's not too noticeable, so I'm not redoing the embroidery. I think it'll be a while before I get back to sewing on this because I'm going camping this weekend. :D Ah, vacation, I have been missing you.

Monday, May 18, 2009

Quilt layout and size calculations

The first thing I did was to calculate the quilt size that I wanted. I decided to make it a twin, but on the large side so that it would work on a double bed as well. I laid the entire quilt out electronically using MS Paint... it's not the most versatile graphics program, but it was quite adequate for the purpose. I really got waaay into this electronic layout. I went as far as to copy fabric swatches from the site where I purchased the fabric and use them as my building blocks. I tried random distributions and arranged distributions, and various border sizes and compositions:


In the end, I decided to go with the design shown above, center. I liked the random layout, but was afraid it would overwhelm the embroidery squares. For the border, I knew that it needed to be fairly large so that I would not have to make the center larger (and do more embroidery!) I liked the quilted portion of the border, and arranged the rest to be simple, but somewhat broken up so that it didn't attract the eye too fiercely.

From here I calculated the fabric requirements. It took quite some time, and I'm glad that I saved the information, because I have referred back to it several times. I double and triple checked my numbers, (and then quadruple checked because the first 3 times I got a different answer each time... finally figured out that I was treating the borders incorrectly). Even when I got it all straightened out, I ordered extra of everything because the fabric was selling out. I will be glad to have some extra when I am done... it's such cute stuff!

Monday, May 11, 2009

Quilt Color selection

My niece's mother and I decided that the quilt should be pink and green... green to tie it in with her current bedroom decorations and pink, which is her favorite color. I did all of my color selecting by computer, from fabrics.com. They have a handy tool that lets you collect your color swatches digitally and then move them around. I didn't like the fact that adding or removing a swatch messed up your organization, though.

There were such beautiful fabrics! Someday, I will definitely have to build a quilt around these:


For my niece, though, I initially selected these, though I wasn't very excited about the color scheme:


Before I got further in the selection process, though, I saw this:


Not only was it easier on me (it's offered in a jelly roll from Moda) being pre-cut, but I liked it much better than the pinks and greens. My sister thought that my niece would love the cheerful colors and thought it would look great in the room. Whew! I learned from my mother's example that it is much easier to make a quilt that you like.

Thursday, May 7, 2009

My First Finish!

Today is my first finish for the second round of Spring to Finish. I completed this embroidery for my niece's quilt. I like to call it "The Pornographic Ken-Doll Raccoon and His Victim."


Backing up a bit, after I had picked out embroidery patterns, I looked at quilt layouts to see what I liked. I didn't have to look very far here, because the one I ultimately picked was one of the first that I saw. I liked the way the embroidery squares were framed by the patchwork squares, and I appreciated the simplicity of the patchwork portions.

I decided not to do it in redwork, though, since I thought my embroidery designs would look better in color.

Next I turned to looking at fabrics...

Tuesday, May 5, 2009

It's a blog...

Yes yes it is. Because I won't have one until I start one. I am doing the Spring to Finish and I started to blog to record my progress. I have been toying with the idea of starting a blog and this is great motivation to start.

First thing we are going to be hearing a lot about my quilt. When my older sister got pregnant, I decided to make a quilt for my first niece. I figured it would be especially meaningful for her later if I got each of my (4) sisters to embroider a block for the quilt and then I would piece them together.

I looked around for embroidery sets that I could use. I was thinking that a day-of-the-week transfer set would be great for a quilt because the blocks would coordinate and I could just take off the words. I looked through my grandma's stash of transfer patterns and checked at Joann's, but I didn't really find anything that inspired me.

It wasn't until three years and two additional nieces later that I finally took the first real step toward this quilt by searching the internet for embroidery patterns. I hit a goldmine when I found a vintage pattern group on Flickr I found these cute kittens, along with a ton of various animals.

I got really excited and downloaded hundreds of patterns. My next task was to pare it down to a reasonable number of patterns. I tried first to do select matching pattern styles, but eventually decided to go for a bold mix because I just couldn't give up some of them. My sisters each gave their input, picking the ones that they wanted to embroider. Finally, I had them all picked.

To be continued...