Monday, June 17, 2013

Tutorial - Cropped pinwheel block

 Today I am hosting the Block of the Month tutorial for Bay Area Modern.  You can see the rest of the blocks on the BAM blog.


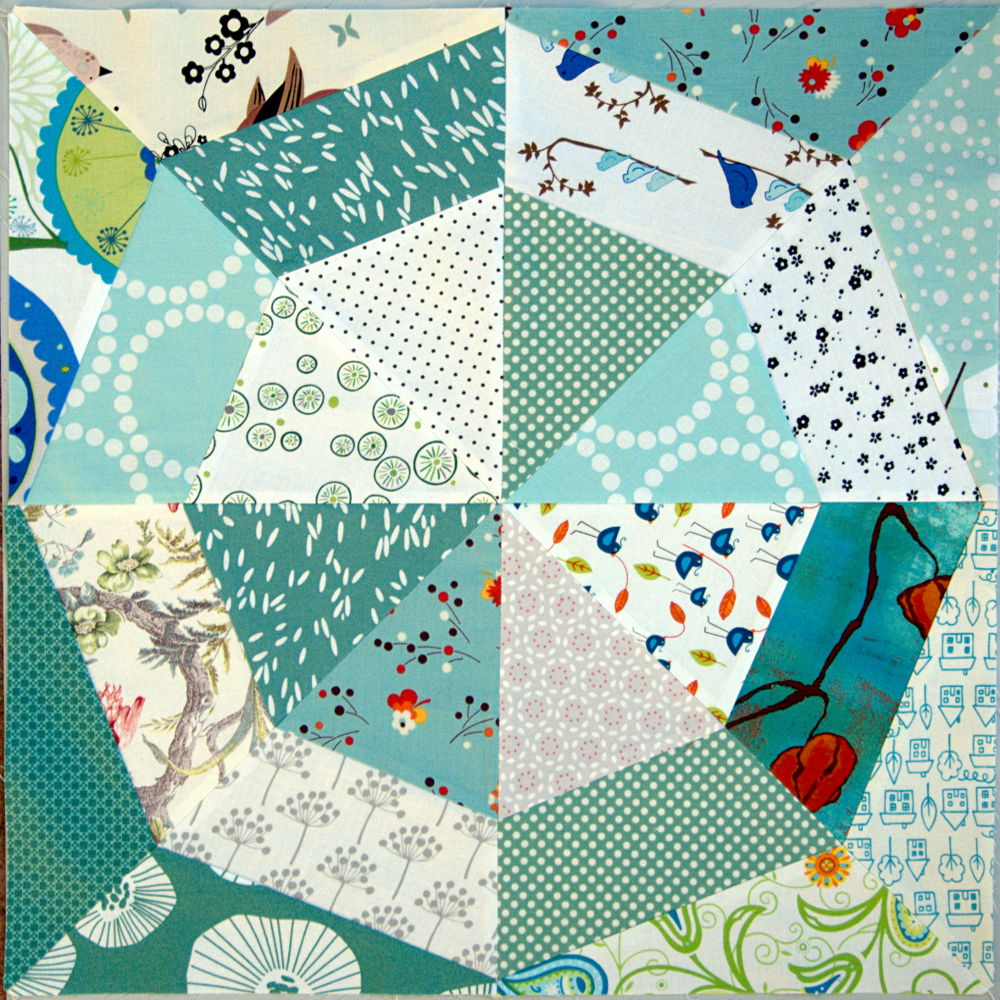
This block is an easy twist on the traditional pinwheel block (also called turnstile).  The asymmetrical cropped point is super simple to implement, making this a quick block to sew.


Starch your fabric pieces before you begin because there is a lot of bias sewing in this block.  I use Best Press and press all seams open.

Stack the two middle size background fabrics together and cut once on the diagonal.  Cut the other three squares in half twice on the diagonal to get four triangles.  All your pieces should look like this:


Fold the smallest triangles in half and use your fingers to make a crease mark.  If you are using a print fabric for the background, fold it with the right sides together.


Place the creased triangles on top of the foreground triangles, aligned at the corner.  With the 90° corner toward you, the triangles should be aligned on the right (as shown). 


Sew the triangles together just to the right of the crease line.  If you are making a 12" block, you may wish to sew a second line 1/2" to the left.  That second line sews your trimmings together into half of a 3" quarter square triangle.  The 6" block trimmings are kind of small to bother sewing up.


Trim off the excess at the corners with a 1/4" allowance and press the seam.

Sew a medium triangle of background fabric to each triangle, along the short pieced edge.  Press.


Sew a larger triangle of background fabric to each piece, along the long edge.  If your triangles are not exactly the same size, that's fine.  Make sure that they line up at the inside point and everything will be good.  Press.


Sew your squares together in twos.  Trim the inside corner seam allowance before pressing the seam open to avoid bulk at the center point.  I aim for an approximate 60° angle. 


Sew the two block halves together.  This is the part where I use pins.  Double pin the center for the best possible point.  Go slow along the center section and make sure your needle goes down just the smiiiidgiest smidge to the right of where the points meet.  Press.


You should have a bit of extra fabric to trim off to get a perfect 6.5" or 12.5".


Wednesday, June 12, 2013

'tites and 'mites

A few months ago, I had a run where my sewing mojo was seriously messed up... it seemed like every time I worked on something I made mistakes left and right.  One of those mistakes was seriously over cutting triangles for this quilt.  I used a 2" strip off of each triangle to sew a cute scrappy binding, but that still left me a lot of extra, smaller triangles to deal with.

I played around with them for a while and came up with the idea for this quilt:


I'm calling it 'tites and 'mites because it reminds me of stalactites and stalagmites. The back... surprise, surprise, it's the Ikea duvet that just keeps on giving (plus a hanging sleeve for the SCVQA show last month - that is off now):


There was some leftover scrappy binding goodness from the other quilt, and I strategically placed it to give a bit more balance to the quilt.  This quilt is going to my newborn nephew - he's the first boy born in my family after a run of 10 girls in a row. 

Friday, June 7, 2013

Spinning stars QAL Finished

Last September, my friend Adrianne linked this Spinning Stars quiltalong on her Facebook page.  I definitely didn't need another project (I'm trying to clear up UFOs) but somehow I found myself replying with "I'm in if you are!"  Well, she was, so off we went. 

I knew that I wanted to emphasize something other than the ring in each block, so I played around with paper and highlighter until I came up with this for color placement:


Originally I did just teal and plum blocks (with white/cream background prints), but I decided that the quilt needed a little more energy, so I added in some pea-soup greens.

8 months later, thanks to a lot of quilting time at the BAM retreat (omg it was awesome!!) a few weeks ago, it's finally done:


I quilted diagonal lines and around the rings. Thanks to Anne @ playcrafts for the tip on photographing in direct sunlight to show quilting better:


 Binding and backing both from Bella by Lotta Jansdotter - one of my favorite lines.  This quilt is a lap quilt for meeeee and you can find it on my couch - ready for snuggling.


 p.s. machine binding... sewn first to the back, then wrapped around to the front.  I prefer that whenever I don't think the extra stitching line will blend with the quilting or the front piecing.

I am happily linking up for for the second week in a row to the crazy mom quilts finish it up Friday.