Tuesday, September 15, 2009

Second rosali baby quilt

I don't like to think things, I like to know things. So when I first saw quilts with pieced backs, which my mother never did, I thought "Well, why doesn't anyone make both sides the front. I will be the FIRST EVER to do this."

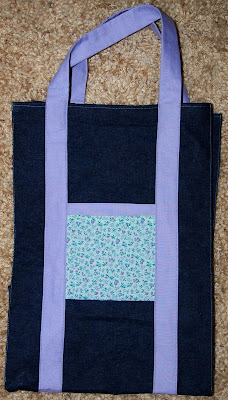
Actually... I get into trouble a lot with this sort of thinking. Like when I decide it'll be easier to sew a seam before turning the purse inside out instead of after like the instructions say... and then discover that with the seam sewn it is impossible to turn the purse inside out.

In case there are other curious souls out there who couldn't figure it out without trying to do it...
a) lots of work
b) more piecing on front and back makes it harder to quilt evenly
c) impossible to get both "fronts" lined up perfectly, so one of them will be a bit crooked.
d) only one side can point up, so why waste all that effort?

If you decide you want to do this, I recommend extra size borders on each side so that when you trim the crookedness won't be as noticeable.

So here is what I made, in red for my second-to-youngest niece, who has a fresh and bold personality even at the tender young age of 13 months.

The front of the quilt is similar to the green version. Here it is before quilting:


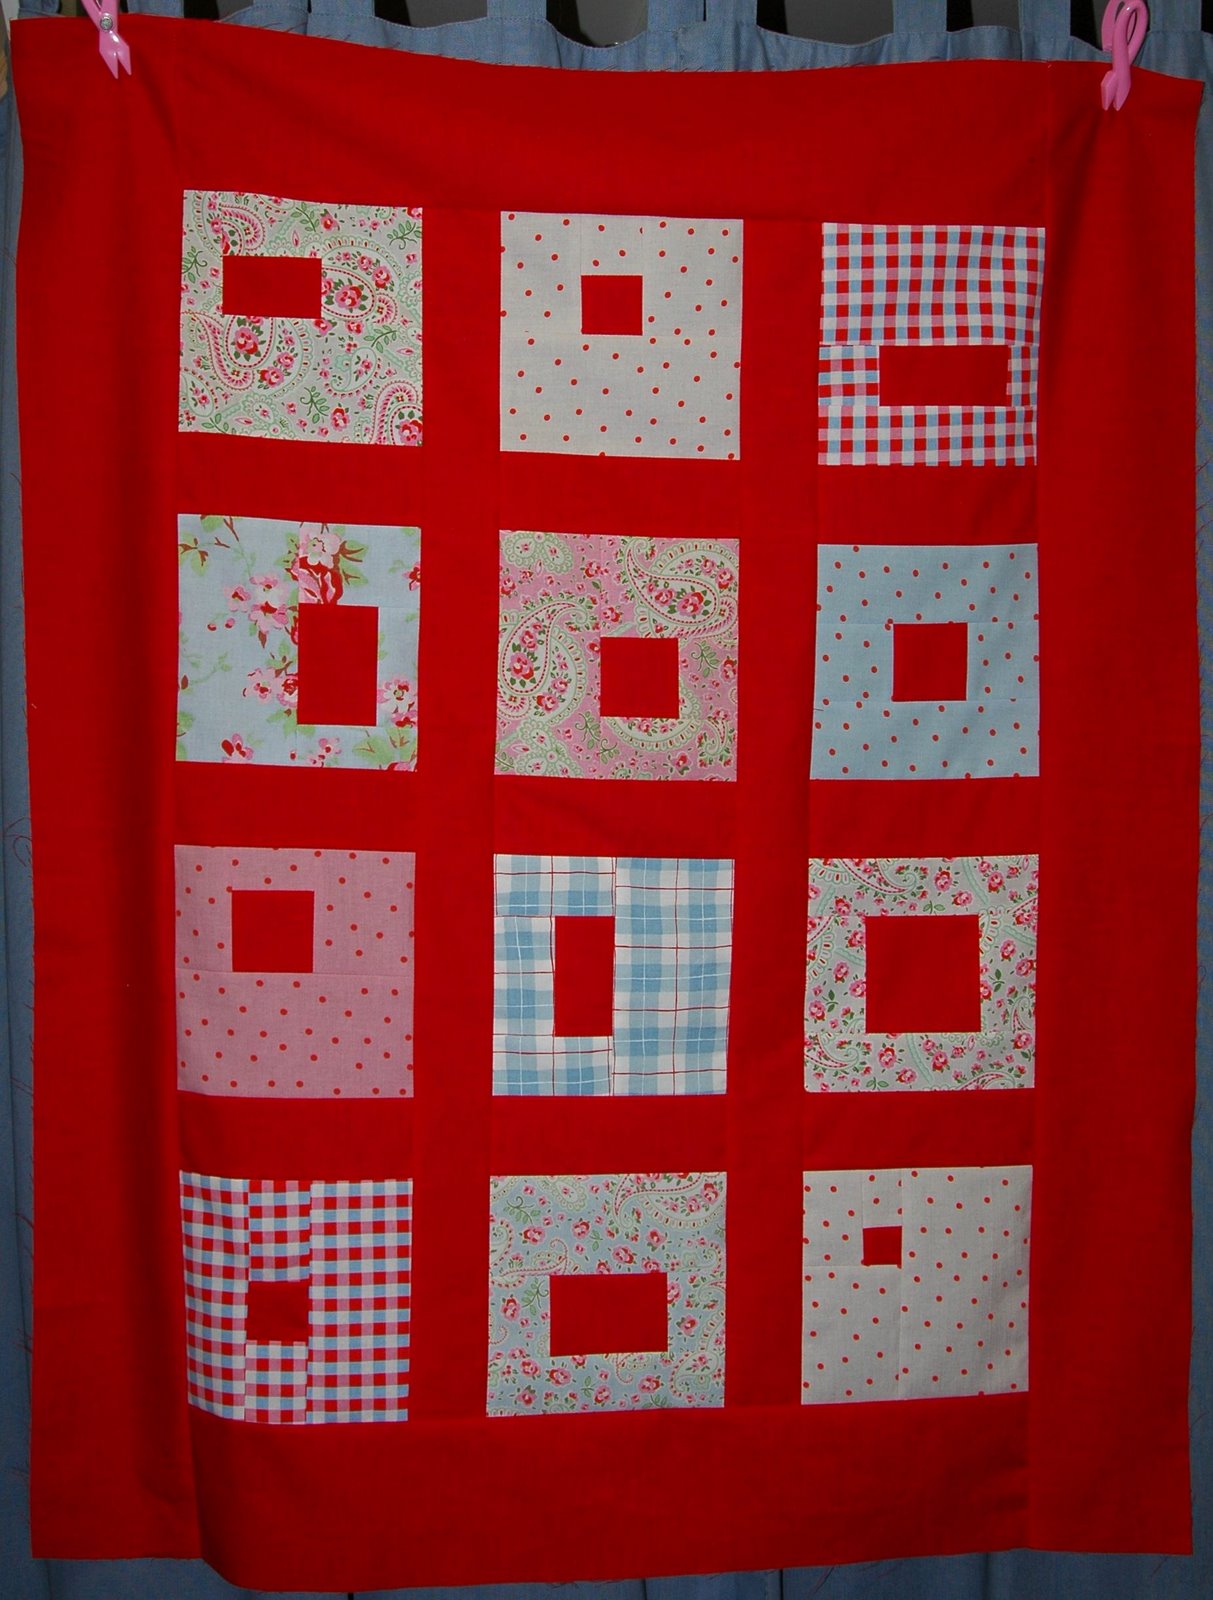
The other front is a nine-patch using the same red:


And for my second foray into quilting, I closely quilted the blocks on the front in a spiral pattern, leaving the sashing unquilted. I like how it emphasizes the blocks, but it was a pain compared to the diamond quilting on the green version.


fyi, my sister is using it nine-patch side down.

Thursday, August 13, 2009

Finally!

Both presents have arrived, so I'm free to brag now. I used the Rosali fabric that I won to make two pretty little baby quilts. They are on the small side, even for baby quilts, only 30" by 36", but at least one of my sisters claims that it is perfect size. I chose the size because I was thinking of it as a little quilt to sit on when playing on the floor.

I designed the front of the quilt by drawing the blocks out on graph paper. I haven't seen a quilt quite like this before, and now I know the reason. When every block is different, you have can't take any shortcuts with cutting. It was painfully slow and after I finished the first one I almost didn't do the same thing for the second.

For my youngest niece, I used green sashing and a lighter green polka dot backing:


The back of hers has 6 wonky paintbox blocks set off center. I loved how they turned out, and I'm definitely going to try this again. I used oh fransson's tutorial. It is for regular paintbox blocks, but it was easy to make them wonky at the trimming step.


The binding is leftover fabric from the blocks. I was astonished at how much fabric I still have left over!


My sister sent me a picture of my niece cuddled up in the quilt and I felt sooo proud and happy.

Tuesday, July 21, 2009

Danger, Will Robinson

Rotary cutter versus fingernail... rotary cutter wins.


A relatively cheap lesson when you consider how close it came to my tender finger flesh. o.o

Monday, July 13, 2009

Some more swaps...

Just in case anyone is wondering, these aren't poorly shot pictures. They are brilliant masterpieces with an aura of mystery. Just so you know.

I finished up a needle book, which does not look *anything* like an underwear liner when it is open:

After I had sewn the needlebook completely, I decided that it needed something to decorate the exterior, so I embroidered two cherries on the flap. I did it without disassembling the book by embroidering blind through a single layer. Lesson learned: embroidery first, sew second!

I also embroidered these two bookmarks. I think undyed fabric was a really great choice for these:


And meanwhile I have been working on my not-exactly-secret project...

Monday, July 6, 2009

An overdue thank you and vegetables (not overdue)

First an embarrassingly overdue thank you to Evelyn at Use The Loot for the Rosali fat quarters that she sent me. Yes, they did arrive, and I love them! I worked all last weekend on two little baby quilts for my youngest nieces. I am trying to decide whether to post pictures or leave it as a surprise. I'm not sure I can wait to share, since I still have a good bit of work to do.

So I'm on a new kick to get my veggies every day. I am targetting lunch time, because that's an easy place for me to make menu changes without affecting anyone else. I guess it's just laziness that was keeping them out of my lunches, since I genuinely like a lot of vegetables. Carrots are crunchy and delicious. Sugar snap peas are the most decadent treat. Broccoli is way cute and totally tasty. And don't even get me started about corn-on-the-cob.

I started with some carrots; I bought a big bag and put them in the fridge at work. I just wash them and then munch on them whole, because really, why do they need to be cut up? This eased me into thinking that it would be simple to add more vegetables, so I made up a list of ones that I could eat raw, and then looked up vegetables that I could cook in the microwave here at work.

Of course my first microwave experiment was corn on the cob (husked, 2.5 min), which needed maybe another minute in the nuculator, but tasted just like corn. Today I had some butternut squash (cut in half, face down on plate, 1/2" water on plate, 7 min). I'm not sure if it was the microwave preparation or the squash itself (I'm used to winter squash, not butternut) but the flavor seemed a bit lacking. Probably the squash, right? How could the microwave suck out flavor? Regardless, it was a good meal and I will probably try again with other squash options.

So everyone eat your veggies! It's easy and they are so good for you.

Sunday, June 14, 2009

Swaps

I finished up two swaps this weekend! Most people wait until their swaps have arrived before blogging about them, but since none of my three readers know my swap partners, I think I'm safe.

The first is for a set of nine patches:


The yellow and blue patches are 12.5" raw to raw and the shades of blue patches are 10.5" raw to raw. WAT?? Yeah seriously, the girl requested 10.5" squares. She said that she didn't really understand seam allowances, but that all of her other squares were that size. That works out to squares cut 3 5/6", so I ended up cutting them 4" and then just sewing them together repeatedly with different seam allowances until it turned out right. (Mostly) It was quite a pain.

I also made a reusable grocery/tote bag. I started this swap a little early, and made this bag from some remnant fabric that I found at Joann's. Two dollars for it! I think it's meant for upholstering outdoor furniture.


It ended up being more of a beach tote shape than a traditional grocery bag shape because the fabric remnant was only 18" x 60", so my options were limited. Because of the cut shape, I made the bag with a seam on bottom and up one side instead of a seamless bottom and seams on both sides. As usual, my "wing it" attitude made the bag more difficult than it had to be (attaching the straps was un-fun), but I got through it.
Unfortunately, by the time I had finished the bag, I was sort of in love. I mean... look at how the pocket stripes head the other direction! It's just a grocery bag, but I couldn't give it away. Luckily, once my partner was assigned, I saw that her preference is for lavender and teal, so I had an excuse to make her a new bag and keep that one. I made it out of some denim fabric that I had stashed and accented it with some leftover costume fabric. This was the result:


Hopefully my partner likes the denim bag... it's not much to my taste so I don't mind sending it off. :P

Monday, June 1, 2009

4th finish and whoa progress!

I sewed up this little number a few weekends ago and just now got around to taking pictures:


I started by randomly cutting into a pair of old jeans, which probably wasn't the most efficient thing, since I later wished that I had left on some of those fabric bits that I had cut off initially, but it was great for the creative process because I ended up having to piece bits back together to get the size of bag that I wanted. It's just right for carrying around my embroidery... except that now I only have one little one left to finish. You can sort of see the little Winnie-the-Pooh fabric that I used to line the bag... that was a steal from Walmart. It's not a very durable-looking fabric, but it's nice and soft. :)

This weekend I worked on my big quilt, and oh-em-gee it's going faster than I expected. I finished all of the pieced blocks for the center of the top and got a good start on the pieced border. Here's what it looks like so far:


I am so, so pleased!