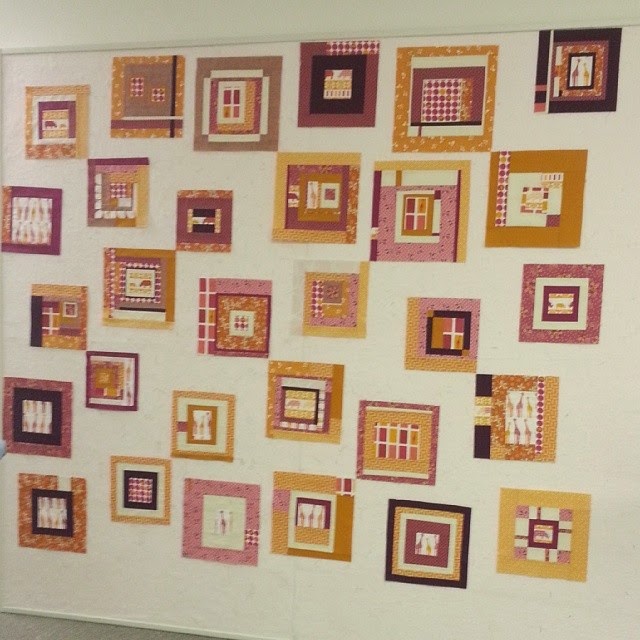
Monday, July 4, 2016
Single Paper Piecing Fun - Doves in the Window
I tried something new! Jamie Swanson posted a tutorial on Instagram for "Single Paper Piecing", where she puts multiple sections of a paper pieced pattern on a single page, and uses fold lines as an aid to assemble the sections. I'm not sure I explained that well, but the tutorial is super clear, so check it out!
I needed to make some 10" Doves in the Window blocks, and I really didn't want to use traditional templates for something so small. I think that could easily become a mess. I couldn't find that particular size anywhere so I made my own paper piecing pattern.
You can grab the paper piecing pattern that I made here. This is for a 10" block.
Happy sewing!
Thursday, September 11, 2014
Wednesday, September 3, 2014
Restyling for dummies (and you)
Note to the reader: I had this sitting around in my queue and decided to post it because it's kinda fun. The shirt actually was not improved by my "restyling" so I didn't take a photo at the time, and now I don't even know where it is. Please don't actually follow this tutorial.
Last night I restyled an old shirt into a fabulous creation. Now once upon a time, in the early days of my clothing sewing, I used to see clothes restyles around the internet and I was like "omg, that is so AMAZING! I wish that I had the skills to do that." Gonna let you in on a little secret folks. It is DEAD EASY. First of all, you are starting with something that you don't give 2 #2's about. Big deal if you mess that up, right? No. Restyling knits is for those days when you have lots of swears built up in your system and you don't want to do something fiddly. I'm determined to prove to you guys how easy this is, so I'm gonna walk you through a restyle. Soon, you will all be believers.
Ok, GO!
Step 1: Put on the subject. This is so that you can examine it for flaws.
Step 2: Go to the fridge and eat a spoonful of bumbleberry jam (another kind is ok). This is because jam is good.
Step 3: OPTIONAL: Turn on the tablet so that you can take a picture of the shirt's flaws in order to put them in an internet tutorial.
Step 4: OPTIONAL: Discover that the tablet is out of batteries. Plug it in and go empty the dishwasher.
Step 5: OPTIONAL: Come back and take pictures of yourself showing the shirt's flaws.
EXAMPLES:


Sleeves that do not extend to the wrist make my face look like this.
Step 6: Create your game plan. In this case, we are going to make this shirt short sleeved.
Step 7: Execute!
Shortening sleeves on a knit (Use your own judgment in deciding when to implement this unsophisticated method. Ugly brown/grey shirts are a good choice.)
Step 1: Draw a line on each sleeve at the length you want.
Step 2: Halfway through, decide that the light in the bedroom is not bright enough for this. Wonder why you always try things first in the bedroom mirror when the light in there sucks. Move to the bathroom. Try to make the sleeve lengths even.
Step 3: Take off the shirt and cut the sleeves off at the lines you drew.
Step 3.5: Put the shirt back on and double check in the (bathroom) mirror that the sleeves are mostly even.
Step 4: Cut 1" off of the ends of the cut off sleeves, at the wrist. Or the "partway-up-your-forearm" if your surgical patient resembles mine.
Step 5: Put on your original shirt (the one you were wearing before you started this) because it is cold in the house.
Step 6: Change your sewing machine needle to one of the following:
Jersey Ball Point 70/10
Jersey Ball Point 80/12
Stretch 75/11
If you have a needle that says the right words but is the wrong size, load 'er up anyway. Whatever. The shirt is brown/grey. If you have NO needles that say Jersey, Jersey Ball Point, or Stretch on the package, go to the store and get one (OR throw the shirt across the room and get yourself some wine).
Step 7: Set your sewing machine to zig-zag stitch. Make sure you have a foot on the machine that has a wide opening to accommodate the zig-zag. Sewing into his own foot makes your machine just as unhappy as it would make you. Sometimes sewing machines can die from it. RIP, Brother XL2600I. *sniff*
Step 8: With your shirt right-side out, your 1" cuff piece wrong side out, and your cut edges together, pin the cuff onto the outside of the cut sleeve, stretching as you go. Start by pinning opposite points, then split the distance between each pin until you have pins spaced ~1-2" apart.
Step 9: Change your sewing machine thread to something that sorta matches because earlier you forgot that thread existed and didn't change it. Use nice thread because remember those swears are still in you and if anything goes wrong with the thread they will probably start trying to come out.
Step 10: If possible, adjust how hard your presser foot pushes down. You might have a dial and an indicator float that goes from 0-3. If you do, try setting it to 1. If not, good luck with guess & check. With knits it is better if your presser foot doesn't go all crazy on them, because they are thicker and stretchy and won't always want to move through the machine.
Step 11: Sew the cuff to the sleeve, then repeat with the other side. Stretch as you sew so that the sleeve part is flat.
CAUTION: At this point, do not look at your shirt and freak out thinking "omg I have ruined my favorite ugly brown/grey shirt and I am never going to be able to do this!" That is, unless you REALLY hate the shirt and you are planning to show it to your husband while crying about how your sewing project went wrong and telling him that you need to go shopping for a new shirt. If you are not planning to do that, don't freak out. It is normal for your shirt to look like it was sewn by a dog. That's because it is a knit.
Step 11: Press your seam so that it will hopefully be obedient and stay to the inside.
Step 12: Try it on. Marvel.
Reader note continued: The best I can recall is that I did not get the sleeves the same length in step 2 so I needed to take off one side and redo it. Then... I didn't. Because that shirt was ugly anyway.
Last night I restyled an old shirt into a fabulous creation. Now once upon a time, in the early days of my clothing sewing, I used to see clothes restyles around the internet and I was like "omg, that is so AMAZING! I wish that I had the skills to do that." Gonna let you in on a little secret folks. It is DEAD EASY. First of all, you are starting with something that you don't give 2 #2's about. Big deal if you mess that up, right? No. Restyling knits is for those days when you have lots of swears built up in your system and you don't want to do something fiddly. I'm determined to prove to you guys how easy this is, so I'm gonna walk you through a restyle. Soon, you will all be believers.
Ok, GO!
Step 1: Put on the subject. This is so that you can examine it for flaws.
Step 2: Go to the fridge and eat a spoonful of bumbleberry jam (another kind is ok). This is because jam is good.
Step 3: OPTIONAL: Turn on the tablet so that you can take a picture of the shirt's flaws in order to put them in an internet tutorial.
Step 4: OPTIONAL: Discover that the tablet is out of batteries. Plug it in and go empty the dishwasher.
Step 5: OPTIONAL: Come back and take pictures of yourself showing the shirt's flaws.
EXAMPLES:


Sleeves that do not extend to the wrist make my face look like this.
Step 6: Create your game plan. In this case, we are going to make this shirt short sleeved.
Step 7: Execute!
Shortening sleeves on a knit (Use your own judgment in deciding when to implement this unsophisticated method. Ugly brown/grey shirts are a good choice.)
Step 1: Draw a line on each sleeve at the length you want.
Step 2: Halfway through, decide that the light in the bedroom is not bright enough for this. Wonder why you always try things first in the bedroom mirror when the light in there sucks. Move to the bathroom. Try to make the sleeve lengths even.
Step 3: Take off the shirt and cut the sleeves off at the lines you drew.
Step 3.5: Put the shirt back on and double check in the (bathroom) mirror that the sleeves are mostly even.
Step 4: Cut 1" off of the ends of the cut off sleeves, at the wrist. Or the "partway-up-your-forearm" if your surgical patient resembles mine.
Step 5: Put on your original shirt (the one you were wearing before you started this) because it is cold in the house.
Step 6: Change your sewing machine needle to one of the following:
Jersey Ball Point 70/10
Jersey Ball Point 80/12
Stretch 75/11
If you have a needle that says the right words but is the wrong size, load 'er up anyway. Whatever. The shirt is brown/grey. If you have NO needles that say Jersey, Jersey Ball Point, or Stretch on the package, go to the store and get one (OR throw the shirt across the room and get yourself some wine).
Step 7: Set your sewing machine to zig-zag stitch. Make sure you have a foot on the machine that has a wide opening to accommodate the zig-zag. Sewing into his own foot makes your machine just as unhappy as it would make you. Sometimes sewing machines can die from it. RIP, Brother XL2600I. *sniff*
Step 8: With your shirt right-side out, your 1" cuff piece wrong side out, and your cut edges together, pin the cuff onto the outside of the cut sleeve, stretching as you go. Start by pinning opposite points, then split the distance between each pin until you have pins spaced ~1-2" apart.
Step 9: Change your sewing machine thread to something that sorta matches because earlier you forgot that thread existed and didn't change it. Use nice thread because remember those swears are still in you and if anything goes wrong with the thread they will probably start trying to come out.
Step 10: If possible, adjust how hard your presser foot pushes down. You might have a dial and an indicator float that goes from 0-3. If you do, try setting it to 1. If not, good luck with guess & check. With knits it is better if your presser foot doesn't go all crazy on them, because they are thicker and stretchy and won't always want to move through the machine.
Step 11: Sew the cuff to the sleeve, then repeat with the other side. Stretch as you sew so that the sleeve part is flat.
CAUTION: At this point, do not look at your shirt and freak out thinking "omg I have ruined my favorite ugly brown/grey shirt and I am never going to be able to do this!" That is, unless you REALLY hate the shirt and you are planning to show it to your husband while crying about how your sewing project went wrong and telling him that you need to go shopping for a new shirt. If you are not planning to do that, don't freak out. It is normal for your shirt to look like it was sewn by a dog. That's because it is a knit.
Step 11: Press your seam so that it will hopefully be obedient and stay to the inside.
Step 12: Try it on. Marvel.
Reader note continued: The best I can recall is that I did not get the sleeves the same length in step 2 so I needed to take off one side and redo it. Then... I didn't. Because that shirt was ugly anyway.
Friday, August 29, 2014
Off the UFO wagon
I was doing so well.
In early 2012 I had 14 UFO projects - and last month I had 5 left, with 3 of them being group quilts (like round robin, etc) that were currently in someone else's hands. In my mind, that means two, TWO projects left to knock off the list. My giraffe blocks are ready for the two-side low volume borders that I have planned, and my medallion quilt is getting bigger and bigger:
But then I went crazy and started 4 new projects within about a month. The good thing about starting so many new things is that I have lots to show you!
I offered to design and piece an opportunity quilt for my guild. The fabric kits are ready for that (blocks will be done by guild members and then I'll put it together) and I'm super excited about the colors:
I took back-to-back workshops from Jacquie Gering (uh... no regrets there, though. She is such an awesome teacher) and I started a new quilt in each one. My quilt from the first class is still just a start, but hopefully it won't be sitting that way for too long:
The second class I went for simpler design in baby quilt size and I finished that top in one more sewing session after the class was over. I'm thinking I might quilt this one with squiggly lines to soften it up a little:
In early 2012 I had 14 UFO projects - and last month I had 5 left, with 3 of them being group quilts (like round robin, etc) that were currently in someone else's hands. In my mind, that means two, TWO projects left to knock off the list. My giraffe blocks are ready for the two-side low volume borders that I have planned, and my medallion quilt is getting bigger and bigger:
But then I went crazy and started 4 new projects within about a month. The good thing about starting so many new things is that I have lots to show you!
I offered to design and piece an opportunity quilt for my guild. The fabric kits are ready for that (blocks will be done by guild members and then I'll put it together) and I'm super excited about the colors:
I took back-to-back workshops from Jacquie Gering (uh... no regrets there, though. She is such an awesome teacher) and I started a new quilt in each one. My quilt from the first class is still just a start, but hopefully it won't be sitting that way for too long:
The second class I went for simpler design in baby quilt size and I finished that top in one more sewing session after the class was over. I'm thinking I might quilt this one with squiggly lines to soften it up a little:
Monday, May 12, 2014
A Happy Scrappy Giveaway!
Edit: The giveaway is now closed! I'll be contacting the winner by email.
I'm sure you guys know this already, but it bears repeating... the online quilting community is so, so nice! When I was making this quilt:
I really wanted it to have lots and lots of different fabrics, but also be very color coordinated. I got tons of help from friends and strangers to collect scraps in my colors, including people who just shipped stuff to me without asking anything in exchange. So as a thank you to all of those kind folks, today I'm paying it forward and giving away some of the extra scrappy bits from this quilt.
![]() |
| This is a photo showing the scrap colors. You may receive some of these fabrics and you will definitely receive a lot of others. |
I will ship domestically in the US, one small flat rate box stuffed to the brim with scraps in rainbow colors. To enter, leave me a comment to say what you're working on OR post a link to your favorite thing that you have ever made.
Saturday, April 5, 2014
My oldest UFO
This month I finished up my oldest UFO. I'm happy to have it completed... it is 1/3 as old as I am! Don't get the wrong idea here - this poor guy has spent most of his life in a drawer. I busted him out recently and got to work so that I could start a new knitting project. When it comes to yarn, I'm committed 100% to just one project at a time and no stash. After all, I've got plenty of stash and UFOs around from my sewing projects without adding more crafts to the bins.
Pattern from the book Color-Bright Creatures by Anne Halliday.
I started crocheting when I was a kid, and by the time I graduated high school I had made a crocheted blanket for each of my sisters. I never got to making one for myself, so I guess this little guy is mine!
Pattern from the book Color-Bright Creatures by Anne Halliday.
I started crocheting when I was a kid, and by the time I graduated high school I had made a crocheted blanket for each of my sisters. I never got to making one for myself, so I guess this little guy is mine!
Tuesday, March 18, 2014
Snowflake Things
Inspiration on a walk
Plans and sketches
Make for a new quilt design
The fabric is from the Color Me Happy line, which I love because I adore those beautiful sketchy flowers and so many low volume prints. I backed it with a lightweight Japanese print that I bought several years ago at a local shop and pieced a binding from little pink dots and my favorite aqua floral print. I wrote up a tutorial for this quilt design, and you can find it on The Intrepid Thread's blog. Happy quilting everybody!
Saturday, March 8, 2014
Charity quilting, 2014
I decided to make it my goal this year to finish at least 10 charity quilts. This is my third charity quilt for the year (I don't always show them when it's not a new pattern - I always have postage stamp quilt just like this one going on that I use as leaders and enders).
Happy prints in pinwheels.
Backed with a Jenean Morrison print that I've been hoarding, quilted vertical straight lines, and bound in a teal solid.
7 to go!
Happy prints in pinwheels.
Backed with a Jenean Morrison print that I've been hoarding, quilted vertical straight lines, and bound in a teal solid.
7 to go!
Tuesday, February 25, 2014
Improv, Baby!
When we came up with the idea to do an all-day improv quilting event in my local guild, I'll admit that I had some mixed feelings about it. People were pretty excited about the idea, and a day of sewing sounded fun. Buuuut... improvising means working spontaneously and/or without preparation. I have the impression that with true improv you kind of go about willy-nilly sewing things, and there is a very real chance of creating something that doesn't appeal to you in the slightest. Kind of like what happened with this improv quilt. I'm trying to clear out old UFOs that got derailed along the way, so the thought of creating another quilt top that would just be a problem child was no bueno.
Besides that... I really love planning! If I head into sewing without a plan or goal, I'm just pushing fabric through my machine. Good for therapy, maybe, but who needs therapy when you're spending the whole day hanging out with your quilty buddies?
In the end I came up with a plan, which was to have a plan. At least, a loose plan. I love the design of this rug, so I decided to make a few square-in-square blocks and few stripey blocks and then add some solid pieces to create a similar look. I was pretty confident that if I kept it simple and used a color palette that really grabbed me, I would be happy with the end result. While I don't feel like I went "aggressively improv," I assembled my blocks with no pre-determined pattern, block size, or quantity, and then worked through arranging them and putting together the top.
I love how it turned out. I did re-discover something that irks me a little about improv piecing. It really is more work to get everything fitting together when you don't plan it from the beginning. Curvy, wonky improv takes doubly long because you have to custom cut every piece to match what's already been added. Ah well.
I free motion quilted the top with Leah Day's pipe maze pattern. She has it marked for beginners, and it's true that it was really easy - plus it has amazing texture. Free motion hasn't been my favorite in the past, but I think as I improve my skill I will also like it more. It's a little easier on your body than straight line since you don't have to haul the quilt around as much. So, I'm working on it.
This was *ahem* supposed to be a donation quilt for charity, but I fell in love with it and ended up making a different quilt to donate in its place. This guy is going to hang on the wall in my sewing room - I've just finished painting in there and am waiting for the fumes to clear. I'll keep you posted!
Besides that... I really love planning! If I head into sewing without a plan or goal, I'm just pushing fabric through my machine. Good for therapy, maybe, but who needs therapy when you're spending the whole day hanging out with your quilty buddies?
In the end I came up with a plan, which was to have a plan. At least, a loose plan. I love the design of this rug, so I decided to make a few square-in-square blocks and few stripey blocks and then add some solid pieces to create a similar look. I was pretty confident that if I kept it simple and used a color palette that really grabbed me, I would be happy with the end result. While I don't feel like I went "aggressively improv," I assembled my blocks with no pre-determined pattern, block size, or quantity, and then worked through arranging them and putting together the top.
I love how it turned out. I did re-discover something that irks me a little about improv piecing. It really is more work to get everything fitting together when you don't plan it from the beginning. Curvy, wonky improv takes doubly long because you have to custom cut every piece to match what's already been added. Ah well.
I free motion quilted the top with Leah Day's pipe maze pattern. She has it marked for beginners, and it's true that it was really easy - plus it has amazing texture. Free motion hasn't been my favorite in the past, but I think as I improve my skill I will also like it more. It's a little easier on your body than straight line since you don't have to haul the quilt around as much. So, I'm working on it.
Monday, January 13, 2014
Marci's round robin quilt
It's hard to believe it, but my guild round robin group has only one round left. I'm a little sad because I have really enjoyed these challenges - but on the other hand I couldn't be more excited about the quilt top they have been creating for me. I believe that I will have that back sometime around April, and I can't wait to show it off here.
Marci's round robin quilt is one of my favorite in our little group - with some stringy lines running around, bursting stars and an asymmetrical layout. I was really digging the 50's style diner kind of groove that it has going on. So, I was pretty eager to get my hands on it! It came to me like this:
I love how all of the initial rounds blend together so that it's difficult to determine where they start and stop. In case you are wondering about it, I believe this is how the previous rounds were added:
I definitely wanted to extend the seamless look into my round, so I drew out what was already present and then planned my round to continue the lines and themes that were already there. I also wanted to refer back to the center block, so I incorporated more larger blocks along with more strings and tiny blocks. I had initially planned on adding equally to all sides, but Marci saw it partway through and was excited about it becoming rectangular, so I added a little extra on the top and bottom.
In the end, it really got huge. There is another round to go on this quilt, plus Marci wants to add some borders, so the amount of fabric that this took turned out to be quite an issue. I didn't recognize the problem until I was deep into construction. I actually eliminated some of the design that I had been planning to do, and it still took nearly all of the fabric that was provided. Thankfully, Marci was able to find most of the fabrics on a local shop-hop, so it turned out ok in the end. Still, a lesson learned for sure - make sure you have enough fabric before you jump in!
Marci's round robin quilt is one of my favorite in our little group - with some stringy lines running around, bursting stars and an asymmetrical layout. I was really digging the 50's style diner kind of groove that it has going on. So, I was pretty eager to get my hands on it! It came to me like this:
I love how all of the initial rounds blend together so that it's difficult to determine where they start and stop. In case you are wondering about it, I believe this is how the previous rounds were added:
I definitely wanted to extend the seamless look into my round, so I drew out what was already present and then planned my round to continue the lines and themes that were already there. I also wanted to refer back to the center block, so I incorporated more larger blocks along with more strings and tiny blocks. I had initially planned on adding equally to all sides, but Marci saw it partway through and was excited about it becoming rectangular, so I added a little extra on the top and bottom.
Thursday, January 2, 2014
Color group quilt
Happy new year! Since I just did a UFO update, I'll refrain from a looking-back-over-2013 post but I do feel like I got a lot done in the end. I think I might have "finishing moods" where I start finishing up projects like wild. It catches hold of me and then I come out the other side exhausted and holding a stack of finished quilts.
I think the stress of closing on our house brought on one of those "finishing moods," and the result is that I have a backlog of quilts to show off. Like this one that I whipped up from teeny tiny blocks that my BAMQG small group made (we interpreted the term small group very literally...):
I sashed all the blocks unevenly in teal and grey, then sewed it into a top and free motion quilted it. The last (and only!) time I free motion quilted a project was back in 2010... and at one point I literally threw that quilt across the room. So, I am happy to say that it went much better this time. This little guy (36" square) has already been passed off to the guild to be donated to the NICU.
I think the stress of closing on our house brought on one of those "finishing moods," and the result is that I have a backlog of quilts to show off. Like this one that I whipped up from teeny tiny blocks that my BAMQG small group made (we interpreted the term small group very literally...):
I sashed all the blocks unevenly in teal and grey, then sewed it into a top and free motion quilted it. The last (and only!) time I free motion quilted a project was back in 2010... and at one point I literally threw that quilt across the room. So, I am happy to say that it went much better this time. This little guy (36" square) has already been passed off to the guild to be donated to the NICU.
Tuesday, December 17, 2013
UFO update
We moved nearly all of our stuff to the new house last weekend. So happy to be in the new space! We originally selected our rental house for the price and location - NOT the condition, so there are a lot of upgrades and amenities that we loving about the new house. My fabric hasn't made the move yet - I know that is usually the first thing people move, but the new house still has some lingering smell from floor refinishing, so I'm waiting for that to clear up some more before I bring my fabric over.
I do have everything packed up, though. Going through my UFO drawers reminded me that it's probably about time for an update. Errr.... make that past time! When I went to pull in the previous list, I discovered that I made it in May of last year. At the time, I had 8 WIPs. I finished four of them but added four more in the same period, so I'm still at 8. The projects are definitely getting more current, though, which is a good thing.
Linen Stripes Quilt Finished in August 2012!
Sewing Machine Cover Finished it, decided I didn't need a sewing machine cover, and then turned it into a tote bag in mid-2013.
Bed Quilt Finished in November 2012!
Embroidered Kitties Quilt Finished in August 2012!
2. Queen of Embarrassing Toasts' Quilt (Modern Quilting Bee) - This quilt is basted and ready for quilting!
3. Giraffe Quilt (Tethered Threads 2 Bee)
I do have everything packed up, though. Going through my UFO drawers reminded me that it's probably about time for an update. Errr.... make that past time! When I went to pull in the previous list, I discovered that I made it in May of last year. At the time, I had 8 WIPs. I finished four of them but added four more in the same period, so I'm still at 8. The projects are definitely getting more current, though, which is a good thing.
![]() |
| This quilt is double-sided and so large that I have never gotten around to taking proper pictures and blogging it. |
| My niece is using this quilt on her bed! |
| 1. Wedding Quilt |
| I have decided that I will probably use this as one side of a double-sided quilt. |
2. Queen of Embarrassing Toasts' Quilt (Modern Quilting Bee) - This quilt is basted and ready for quilting!
![]() |
| My sister has spoken for this quilt. |
3. Giraffe Quilt (Tethered Threads 2 Bee)
4. Secret project
What? It's a secret. No pictures!
5 (NEW). Round Boo Bee
My new (as of this year) approach is to slow down on starting new projects to keep from getting bogged down with new starts, and meanwhile chip away at the older projects in between. With that in mind, I'm setting my new year's resolution early: Whether I start new projects or not, I want to get my UFO&WIPs list down below five by the end of 2014. 5 (NEW). Round Boo Bee
![]() |
| My round robin quilt is still going! We are filling in the four corners to bring this out to square. |
6 (NEW). Other secret project
What? It's a secret. No pictures!
7 (NEW). BAM-BOM Quilt (more like an ongoing project than a UFO)
![]() |
| Photo from the design wall - I need to sew these blocks together and then I have four borders planned.. |
Thursday, December 5, 2013
Excited, exhausted, and confused
I have been in such a state lately. We spent the last two months shopping for and then buying a house (I know, it was so fast!!) I'm still in shock about it, and at the same time so excited that sometimes I feel a little ill. In addition to the happy transition from renting to owning, I'm thrilled that my sewing area will be moving from the dining room table to my very own sewing room.
It's not much to look at yet, but hopefully it will be!
Because of some work that needs to be done at the new place, we won't be moving our furniture until mid-December. In the meantime, I have plunged enthusiastically into getting ready to move. I have to say, the logic element doesn't factor very strongly into the tasks that I've been completing in "preparation" for moving. For example, I had some thread spools sitting on top of my fabric drawers, so I decided to put them away. There wasn't room in the thread bin, so I ended up on the floor surrounded by a hundred spools of thread, winding loose thread and picking out ones that could go in the trash bin. Oh wait, actually that does make sense. Clearly, organizing my thread = critical pre-move preparatory step.
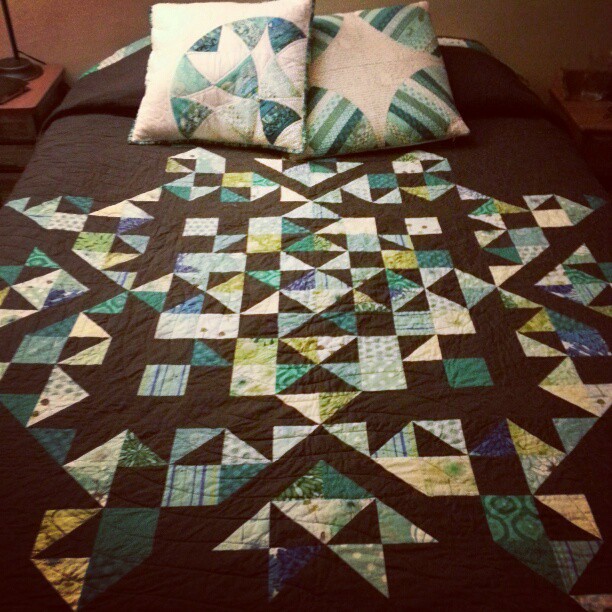
I said in the title that I was confused, but actually has to do with the blog, not the move or the new house. I thought that I had already posted something from a few months ago, but now I don't see it! Since that apparently happened only in my mind, here is what was passed to me for Kelly's round robin (with my local MQG):
And here's where I ended up:
I planned the outline for my additions on graph paper, with the hope of echoing and emphasizing the partial star shape. Once I started sewing, I added in a little bit of improvisation with details like the geese and the nine patches. I just love this quilt, and I'm totally jealous that Kelly gets to keep it. I can't steal it 'cause Kelly would just track me down... but maybe I'll duplicate it when some more of my UFOs are cleared out.
It's not much to look at yet, but hopefully it will be!
Because of some work that needs to be done at the new place, we won't be moving our furniture until mid-December. In the meantime, I have plunged enthusiastically into getting ready to move. I have to say, the logic element doesn't factor very strongly into the tasks that I've been completing in "preparation" for moving. For example, I had some thread spools sitting on top of my fabric drawers, so I decided to put them away. There wasn't room in the thread bin, so I ended up on the floor surrounded by a hundred spools of thread, winding loose thread and picking out ones that could go in the trash bin. Oh wait, actually that does make sense. Clearly, organizing my thread = critical pre-move preparatory step.
I said in the title that I was confused, but actually has to do with the blog, not the move or the new house. I thought that I had already posted something from a few months ago, but now I don't see it! Since that apparently happened only in my mind, here is what was passed to me for Kelly's round robin (with my local MQG):
And here's where I ended up:
I planned the outline for my additions on graph paper, with the hope of echoing and emphasizing the partial star shape. Once I started sewing, I added in a little bit of improvisation with details like the geese and the nine patches. I just love this quilt, and I'm totally jealous that Kelly gets to keep it. I can't steal it 'cause Kelly would just track me down... but maybe I'll duplicate it when some more of my UFOs are cleared out.
Sunday, August 18, 2013
Rhonda's Round Robin, UFOs, and my neck
It has been pretty slow on the blog lately - and for good (bad?) reason.
Apparently the cumulative affects of years of bad posture and too many looking-down-at-things activities (oh hai sewing) made some discs in my neck go all bulgy and smush into my spinal cord. WHICH, as it turns out, makes you hurt all kinds of places other than your neck.
The good news is that they finally got from me saying "under my shoulder blade and also near my elbow hurt really bad and I can't lay down without wanting to cry so I don't get any sleep at all" to the doctor saying "lay on this thing for a few minutes a day and cut back on sewing and looking through microscopes."
Nowadays the only pain I get is in my actual neck, when I've done too many looky-downy things. I am not able to spend a lot of time sewing yet, but I have been able to get some in. First on my list is for my guild round robin. Rhonda asked for people to add pieces to her quilt in a log-cabin fashion, i.e. add to only one side, going in a spiral pattern from one person to the next.
This is the piece that I received, with Rhonda's start on the upper right, Kelly's addition below that, and Jen's piece on the left.
I took inspiration from the fabric down the left side and decided to make some diamond & chevron shapes (on the dark purple background). After adding that, I felt that my part stood out too boldly, so I put on an additional section that incorporated the stripes, chevrons, and multiple backgrounds that other people had used. Then I did raw edge applique and added flowers to blend the two sections a little and tie in with Jen's contribution.
I know I've said it already, but it bears repeating - I love the challenge of this round robin! It is certainly a welcome change of pace... I have been working for nearly 2 years now on clearing out my UFOs. Since January 2012 when I declared my goal of living a UFO-free life, I have finished 7 of the 10 quilts that were in progress at the time, and 9 smaller projects that were languishing in my sewing room. Since the Great Declaration, I started an additional 12 quilts and finished 7 of them, leaving me with 5 new projects in progress. Even though my number of quilt UFOs has only gone down by 2, it's a big success for me considering that before 2012 I generated new UFOs at a rate of about 3 per year. Also, my UFO's are getting "newer", which means that they are a better match to my current taste.
Still, these round robin quilts are a welcome break and a chance to get inspired & creative. Jen passes to me in this round robin, and her great sense for simple & effective design puts the pressure on! I just saw what she did for Marci's piece and my mind is already rolling thinking of what I will add.
Apparently the cumulative affects of years of bad posture and too many looking-down-at-things activities (oh hai sewing) made some discs in my neck go all bulgy and smush into my spinal cord. WHICH, as it turns out, makes you hurt all kinds of places other than your neck.
The good news is that they finally got from me saying "under my shoulder blade and also near my elbow hurt really bad and I can't lay down without wanting to cry so I don't get any sleep at all" to the doctor saying "lay on this thing for a few minutes a day and cut back on sewing and looking through microscopes."
Nowadays the only pain I get is in my actual neck, when I've done too many looky-downy things. I am not able to spend a lot of time sewing yet, but I have been able to get some in. First on my list is for my guild round robin. Rhonda asked for people to add pieces to her quilt in a log-cabin fashion, i.e. add to only one side, going in a spiral pattern from one person to the next.
This is the piece that I received, with Rhonda's start on the upper right, Kelly's addition below that, and Jen's piece on the left.
I took inspiration from the fabric down the left side and decided to make some diamond & chevron shapes (on the dark purple background). After adding that, I felt that my part stood out too boldly, so I put on an additional section that incorporated the stripes, chevrons, and multiple backgrounds that other people had used. Then I did raw edge applique and added flowers to blend the two sections a little and tie in with Jen's contribution.
I know I've said it already, but it bears repeating - I love the challenge of this round robin! It is certainly a welcome change of pace... I have been working for nearly 2 years now on clearing out my UFOs. Since January 2012 when I declared my goal of living a UFO-free life, I have finished 7 of the 10 quilts that were in progress at the time, and 9 smaller projects that were languishing in my sewing room. Since the Great Declaration, I started an additional 12 quilts and finished 7 of them, leaving me with 5 new projects in progress. Even though my number of quilt UFOs has only gone down by 2, it's a big success for me considering that before 2012 I generated new UFOs at a rate of about 3 per year. Also, my UFO's are getting "newer", which means that they are a better match to my current taste.
Still, these round robin quilts are a welcome break and a chance to get inspired & creative. Jen passes to me in this round robin, and her great sense for simple & effective design puts the pressure on! I just saw what she did for Marci's piece and my mind is already rolling thinking of what I will add.
Thursday, August 8, 2013
Tutorial - More Birds in the Air
This month I am hosting the Block of the Month tutorial again for Bay Area Modern. You can see the rest of the blocks on the BAM blog.
This block is a variation on the traditional Birds in the Air quilt block, translated to a 16-patch rather than 9. This tutorial makes two blocks at a time. One option for a 12" finished block is to make two sets of the 6" block and then arrange them in a four-patch.
The final look of the block will be like this if you chose to cut your 4 rectangles from background fabric:
Or like this if you chose to cut them from print fabric:
Starch all your fabric pieces before you begin because there is a lot of bias sewing in this block. I use Best Press and press all seams open.
Sew and trim up the half square triangles using your preferred method. If you are going for a scrappy look, you may want to sew in pairs. If you are sticking with just 2 fabrics for the block, you can use this method to make 8 HSTs at once.
All your pieces should look like this:
Lay out the pieces as shown below, then sew together in rows:
Sew the rows together (it's supposed to be a rectangle right now... don't worry!) Turn the block over to mark the back. Draw a line on either side of the center diagonal, just touching the points of your print triangles:
Lay the pieced rectangle centered over the large rectangle (right sides together) and sew down each of the drawn lines. Cut the in half between the sewn lines.
Press the seams, and trim off the extra background fabric to get a perfect 6.5" or 12.5".
Done!
This block is a variation on the traditional Birds in the Air quilt block, translated to a 16-patch rather than 9. This tutorial makes two blocks at a time. One option for a 12" finished block is to make two sets of the 6" block and then arrange them in a four-patch.
The final look of the block will be like this if you chose to cut your 4 rectangles from background fabric:
Or like this if you chose to cut them from print fabric:
Starch all your fabric pieces before you begin because there is a lot of bias sewing in this block. I use Best Press and press all seams open.
Sew and trim up the half square triangles using your preferred method. If you are going for a scrappy look, you may want to sew in pairs. If you are sticking with just 2 fabrics for the block, you can use this method to make 8 HSTs at once.
All your pieces should look like this:
Lay out the pieces as shown below, then sew together in rows:
Sew the rows together (it's supposed to be a rectangle right now... don't worry!) Turn the block over to mark the back. Draw a line on either side of the center diagonal, just touching the points of your print triangles:
Lay the pieced rectangle centered over the large rectangle (right sides together) and sew down each of the drawn lines. Cut the in half between the sewn lines.
Press the seams, and trim off the extra background fabric to get a perfect 6.5" or 12.5".
Done!
Subscribe to:
Posts (Atom)