Thursday, May 31, 2012

Rainbow squared quilt-along, coming up! (and a little giveaway)

I'm really excited to announce that... I'm going to run a sew-along for my scrappy rainbow quilt!  June is a busy month for me, so it won't start in July.  However, I thought I would give a little teaser now because if you wish to participate you will need to start collecting scraps. 

Introducing....

R is for rainbow.  If you understand the title... I'm so, so sorry.  It's a working title.   As in, I've been working too much and that influenced the title.  How about this?  If you can come up with a better name for it, I'll send you some rainbow scraps to start (or increase!) your stash for the quilt-along.  If you suggest a name, make sure that your email is either visible in your profile or included in your comment, so I can get ahold of you. 

Like I said, this is just a teaser, since it might take a while to accumulate scraps.  For the smallish twin (62" x 82") that I'm making, you need 200 squares of each color (2.5").   If you have 2.5" strips, go ahead and leave them that way instead of cutting them into squares.  I will be including solid squares with little embroidered animals on them, so I am also collecting coordinating solid yardage (scraps are hard to work with for embroidery).  

We (or I...  haha, I have no idea if people will be joining in!) will be taking this slowly to give time for embroidery and so that people with busy schedules can participate.  I think many of you see what to do just from looking at the picture above, so if you are anxious to blaze ahead, that is fine as well. 

So tell me... do you have a better name to suggest?  Do you think you will join in?  Do you have a friend who might want to join in, too?  Wheeee, I'm looking forward to July!

Monday, May 28, 2012

Invisible zipper... like the easiest thing ever.

Dude.  Did you know that it's easier to put in an invisible zipper than a regular one?  'Cause... I didn't.  I should really say, it's easier to sew in an invisible zipper and make it look nice.  They are invisible!  With regular zippers things show and there is top stitching and everyone can see that you sewed it on wiggly and then didn't bother to try it again.  I'm on like my 20th regular zipper and they still look like crap. 


Invisible zipper try number 1:


That zipper is in the back of my Lily bridesmaid's dress, by the way, which is progressing well.  I haven't showed pictures of it because the outer shell went together really quickly and now I'm doing all the finishing work (lining, zipper, hemming, etc).  Might as well wait until it's really finished rather than show it at 90% and then show it looking nearly the same after hours and hours of additional work.

I was nervous about the invisible zipper but the pattern instructions link to this great tutorial on the Colette blog.  I followed it super sloooowly and carefully (I might have been holding my breath) and it turned out perfectly.  My machine only came with a regular zipper foot, so I bought a plastic invisible zipper foot for two dollars at Joann's... that was the only thing that gave me problems.  It wiggled around and even warped, but the zip is in anyway.  Once I pick up a real invisible zipper foot, I will be unstoppable!

So go forth, my friends.  Sew invisible zippers.  Meanwhile, I'm going to be messing about with plywood, wood glue, and screen mesh.  DH and I going to camping in our truck - the cabin can be opened into the covered truck bed, so you sleep with your head in the back seat and your legs in the bed.  We've heard that's nicer if you temporarily replace the back window with a screen to allow air circulation, so we are currently constructing one.  Good times.

Saturday, May 26, 2012

The aftermath continues

Does the word "aftermath" hold a bad connotation for you?  Just checking, because I've got nothing bad to report!  I just got a second pack of little fabric scraps from Kristen, and they are so, so cute.  Once again, I've been saved a bunch of work because they are all cut in 2.5" strips.  Wheee!  She even put in a strip of Heather Ross's Wildflowers on orange, which may or may not be too dear to put into my niece's quilt (hint: my preeeeeeciousssssssssss).

Also, I won a giveaway!  Madelyn gave away three copies of her Henrietta Hippo pattern:


...and I got one.  She said she liked my comment, which I won't repeat, but you can read here.  Warning.  It could be disturbing to you if you think of hippos as cute and cuddly and also have a tendency to look up and watch youtube videos that you hear about.  I actually already cut the pieces for a Henrietta - she's pretty small and the pattern looks easier than I expected based on the finished picture.  If you want to make one too, head over to Madelyn's blog and pick up a 35% off coupon that's good all weekend. 

Meanwhile, wish me luck on Henrietta!  She'll be the first animal that I've sewn.  

Friday, May 25, 2012

The aftermath

Whew, what a week!  I had more than 400 entries in my SMS giveaway, which totally blew me away.   The winner of the giveaway is Adele, who is actually planning to go to QuiltCon!  What a double lucky duck.

I also got a lot of responses regarding fabric swapping.  However, several people were no-reply bloggers and I could not get ahold of them.  If you left a comment about swapping and I didn't reply, check your profile and make sure that it is set to "show email."  If so, I also may missed that you said you wanted to swap.  If I didn't get back to you, another comment on this post should set things straight.

A couple of people were SUPER QUICK with organizing the fabric swapping, and we have already mailed fabric to each other.  I even got Shannon's package tonight - she sent me leftovers from a pretty rainbow quilt that she recently finished.  Not only are the colors just right, the squares are already cut to 2.5".  I was totally doing my happy dance when I opened it! 

Thank you so much to everyone who joined in this week.  I had a total blast. 


Monday, May 21, 2012

Giveaway Day!

EDIT: The giveaway is now closed! Thank you to everyone who entered.


It's Giveaway Day (Week), as you probably know.  If you somehow got here without being aware of Giveaway Day, click on either icon above to head to Sew, Mama, Sew! where hundreds of giveaways are linked up for a huge week of crafty, gifty, goodness.  After you enter my giveaway, that is.

I'm giving away this fat(ter) eighth set (it's cut 18" x 10" rather than 20" x 9") in the colors of the QuiltCon logo.  It's perfect if you want to enter the QuiltCon block challenge - a bit of scrappy variety for your block.  If you aren't planning to enter the challenge, it's a gorgeous set of colors and you are still welcome to it:


All you have to do to enter is leave a comment.  You could tell me that you've never heard of QuiltCon before, or that you're going, or link me to the awesome QuiltCon block that you made or saw, or you can just type in "asdf" or something if you are trying to enter giveaways as fast as possible - I totally understand that and really don't mind. OR you can tell me that you want to swap some scraps with me (see below).

Followers, old and new, get another entry.  Just leave a second comment telling me that you are a follower.  RSS feed and following by email both count, too.  

Entries accepted until May 25, US shipping only.  (Last time I offered international, I paid more than 3x the value of the fabric to send it to the winner in AFRICA).   

--------------------------------------------------------------------------------------------------------------------------
Now what was that about scrap swapping?   I am in search of scraps for a rainbow quilt that I have planned, and looking for anyone interested in swapping with me.  You give scraps (min size 2.5" square, 2.5" strips 
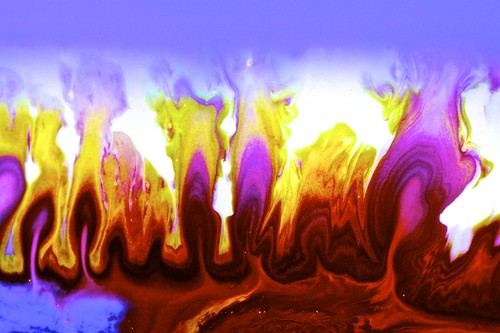
appreciated) and I give you yardage in return.  I'm looking for modern fabrics in all the colors in the image below, but particularly the just so slightly orange-y sunshine yellow and just so slightly maroon-y fire engine red.  This quilt is for a child - cute animals, flowers, bugs, etc are fine on the fabric but definitely not required.  You can see some of the yardage that I  have available to trade right here, or if you're interested in unloading scraps but nothing catches your eye, we can discuss what else you might like.  Leave me a comment if you are interested, and I'll get back to you.  Your comment will also enter you for the giveaway, so no need to leave a separate one just for that.


-------------------------------------------------------------------------------------------------------------

Are you still here?   That's awesome.  Welcome to my blog!  If you'd like to look around a little, I recommend the Quilts and Clothes pages, where you can see pictures of my completed projects.  Clicking on a picture will take you to the blog post for that project, if there is one. 

Happy Giveaway Day!


Monday, May 14, 2012

Emmeline looooove

I'm ashamed to admit that I started this apron... oh, at least year ago.  It's a really easy pattern, but  poor fabric choice sent it to purgatory (my UFO drawer) for 6 months until I busted it out for the first guild sew day of 2012.  Brandishing my seam ripper, I attacked the beautiful but too-busy teal polka dot that I had used for the above- and below-bust stripes and replaced with a lighter solid teal.  Fear not - I did keep the teal polka dot in there for the ties.

Back when I started the apron, my niece made me a special drawing that I had planned to turn into an embroidered pocket.  That could not be skipped, so Mr. Apron (or is it a Ms?) waited patiently for another few months while I got myself together and made the pocket, thanks to another guild sew day.  I save my problem projects for the sew days because good company helps me work on things that are being difficult.

I tried out some fun stitches from the embroidery book "Doodle Stitching" by Aimée Ray

Another month or so and I had the binding/neck strap hand stitched.  The instructions call for hand stitching this, but I top stitched all of the other aprons.  Honestly I only hand stitched this one because I was almost out of matching thread and I didn't think there was enough for top stitching.  Note to self... it would have been waaaay faster to make a trip to Joann's and buy more thread.


Just when this poor guy thought he was finally done, I decided to do a little more adjustment.  The gathered bust was a pretty good fit, but it was uniformly sized across.  That make it kind of sag in a little lump in the center where there is no... curvature to push it out.  Using my mad genius sewing skillz, I opened up the bottom of the apron and did a little cosmetic surgery.  I effectively change the bust pattern piece like so:

That fixed things right up, and even added a little va-va-voom!


Tying that bow so prettily took a long time
Did I mention that it's double-sided?
I put this baby to work the other night for rolling out pizza dough.  Yay for flour-free clothes!

Sunday, May 6, 2012

A block is born

This block started with an inspiration image that I saw on flickr.
purple fire
purple fire by pery∼going with the flo-viz
I sketched...

Colored...
I like this one, but I decided it was too rainbow-y for the look I wanted

Recolored... 
I still like this one too

And revised... 
But I decided to go with this one

I wanted all of my corners to meet just right, so I decided that it would be easiest to paper piece this block.  I have heard that after you give birth, you sort of forget how bad it was (otherwise nobody would do it more than once).  I think paper piecing is like that.  I never fully remember how much work there is in prepping the paper pattern, cutting pieces, and then arranging everything just right before you sew.   So pause on the story for a bit while I write a few notes to myself:

  1. You don't enjoy paper piecing as much as you think.
  2. It takes a long time to get everything ready.
  3. Don't forget to reverse your pattern.  Also make sure directional pieces are cut in the right orientation.
  4. Cut the pieces bigger, for goodness sake.  1/2" extra all around, not 1/4".  
  5. Baste the first piece onto the paper before you try to add the second one.  It's easier.
  6. The fast way is:  Fold over the paper at the seam you are going to sew and trim the seam allowance to 3/8".  Put the piece you are going to add face up on the table.  Match the folded over pattern piece with the piece on the table, grab it all and sew.  Check coverage, trim seam allowance to 1/4", press..  Go again with the next piece.  You even made pictures of this last time and still you forget:


Ok back to the story.  If you read my notes to myself, you won't be surprised to learn that my finished block is backwards:
And the elephants and the Echo fabric were both upside down, so I just turned the block that direction.  It actually matches the inspiration image a little better this way. 
I'm calling it "Elephant Crossing."

Thursday, May 3, 2012

UFO parade

On Tuesday I finally finished up my long-awaited apron (pictures hopefully after the weekend!), which brings me to my New Year's goal of 5 fewer UFOs than I had at the start of the year.  Woot!  Now I could just coast through the rest of the year and make sure I finish as many projects as I start, but where's the challenge in that?

I checked in with my master list, which says I have 8 quilting projects in progress right now.  I'd like to get that down to 4 by the end of the year and eventually down to only one ongoing quilting project (plus one garment project and one crochet project).  Rhonda in my local modern guild has no UFOs ever because she always finishes one project before moving on to the next.  I can totally do that, right?

For a motivational boost, I brought out the projects on my list and took pictures.  This list is more or less in the order than I plan to work on them, but who knows!  Inspiration may strike.  I'm eyeing #7 pretty hard right now. 


1.  Linen Stripes Quilt  Finished in August 2012!
A flimsy right now that will be backed by this Denyse Schmidt dot from Joann's (P.S. why is that fabric so freakin expensive?? It's at JOANN'S!)

2.  Sewing Machine Cover Finished it, decided I didn't need a sewing machine cover, and then turned it into a tote bag in mid-2013.


3.  Bed Quilt Finished in November 2012!
The striped flimsy is the "top" and the grey and print HST flimsy is the in-progress "back" to this double sided quilt.

4.  Embroidered Kitties Quilt  Finished in August 2012!
These blocks need to get sewn up and quilted!  I'm pretty sure my niece is ready to start using this.

5.  Wedding Quilt
The top is complete but I don't know what to put on the back.  It's pretty girly, so should I roll with that or try to counteract it?

6.  Queen of Embarrassing Toasts' Quilt (Modern Quilting Bee)
My sister has spoken for this quilt.  The more I finish it the more I like it!

7.  Giraffe Quilt (Tethered Threads 2 Bee)
This is one of those times when cutting a precious fabric turned out to be the best choice.  This quilt is definitely staying with me.  The block/fabric combination is straight copied from Film in the Fridge.  Sometimes you see something and you just gotta have it. 

8.  Secret project
What?  It's a secret.  No pictures!

I'm glad I pulled them out because it reminded me that I have projects stored away that I LOOOOOVE... I just put them away because something more urgent came along. 

So spill the beans... how many projects do you have going?  Anybody like Rhonda with only one project?  Or are you as bad as me?  If you want to join in the UFO busting fun, the Project UFO Flickr group is filled with enthusiasm and support, so head on over!